
1. Your sensor size matters
Before opening a single lens listing, find out what sensor you’re actually trying to cover. GSMArena is the fastest route: find your phone model, open the camera specs, and look for the modded module specs. There will be numbers in inches like 1/1.35". That notation reads backwards until you remember it’s a fraction: bigger number after the slash means smaller sensor, so 1/1.12" is bigger than 1/1.3", which is bigger than 1/2.55".
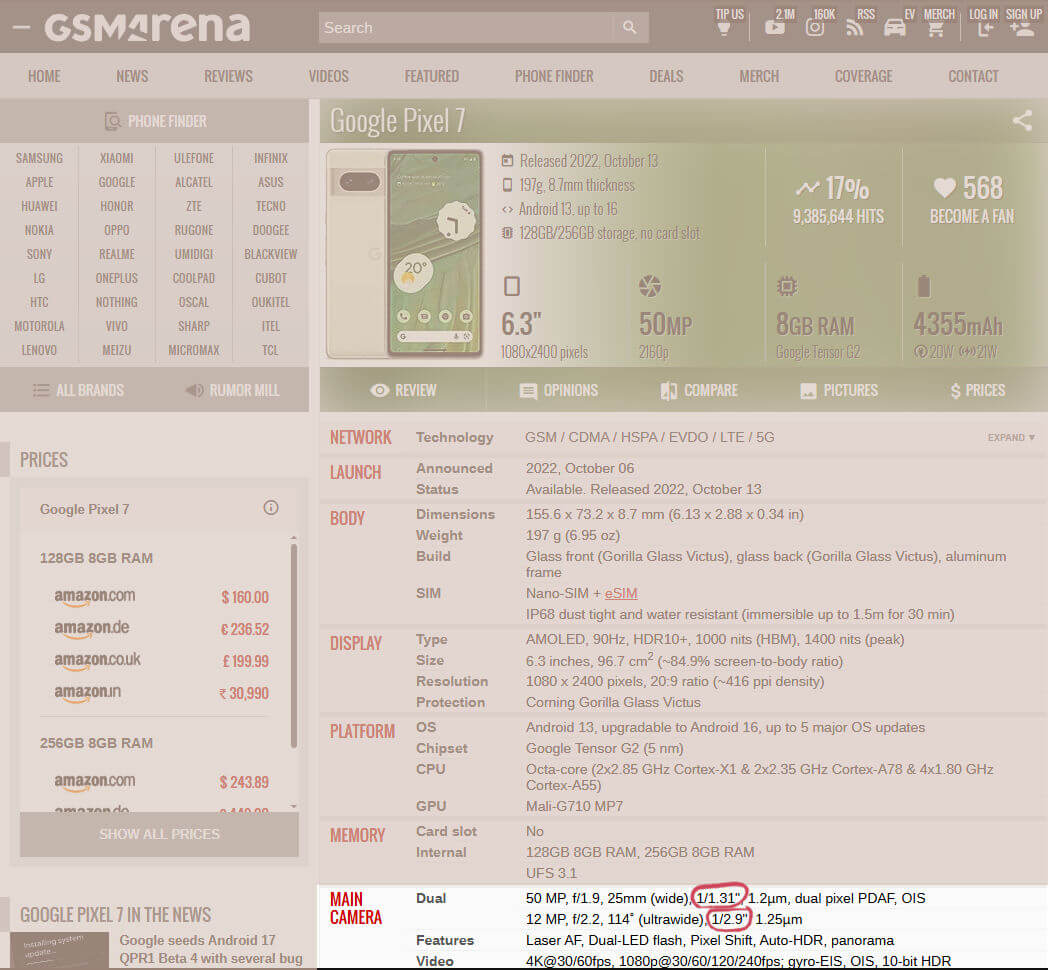
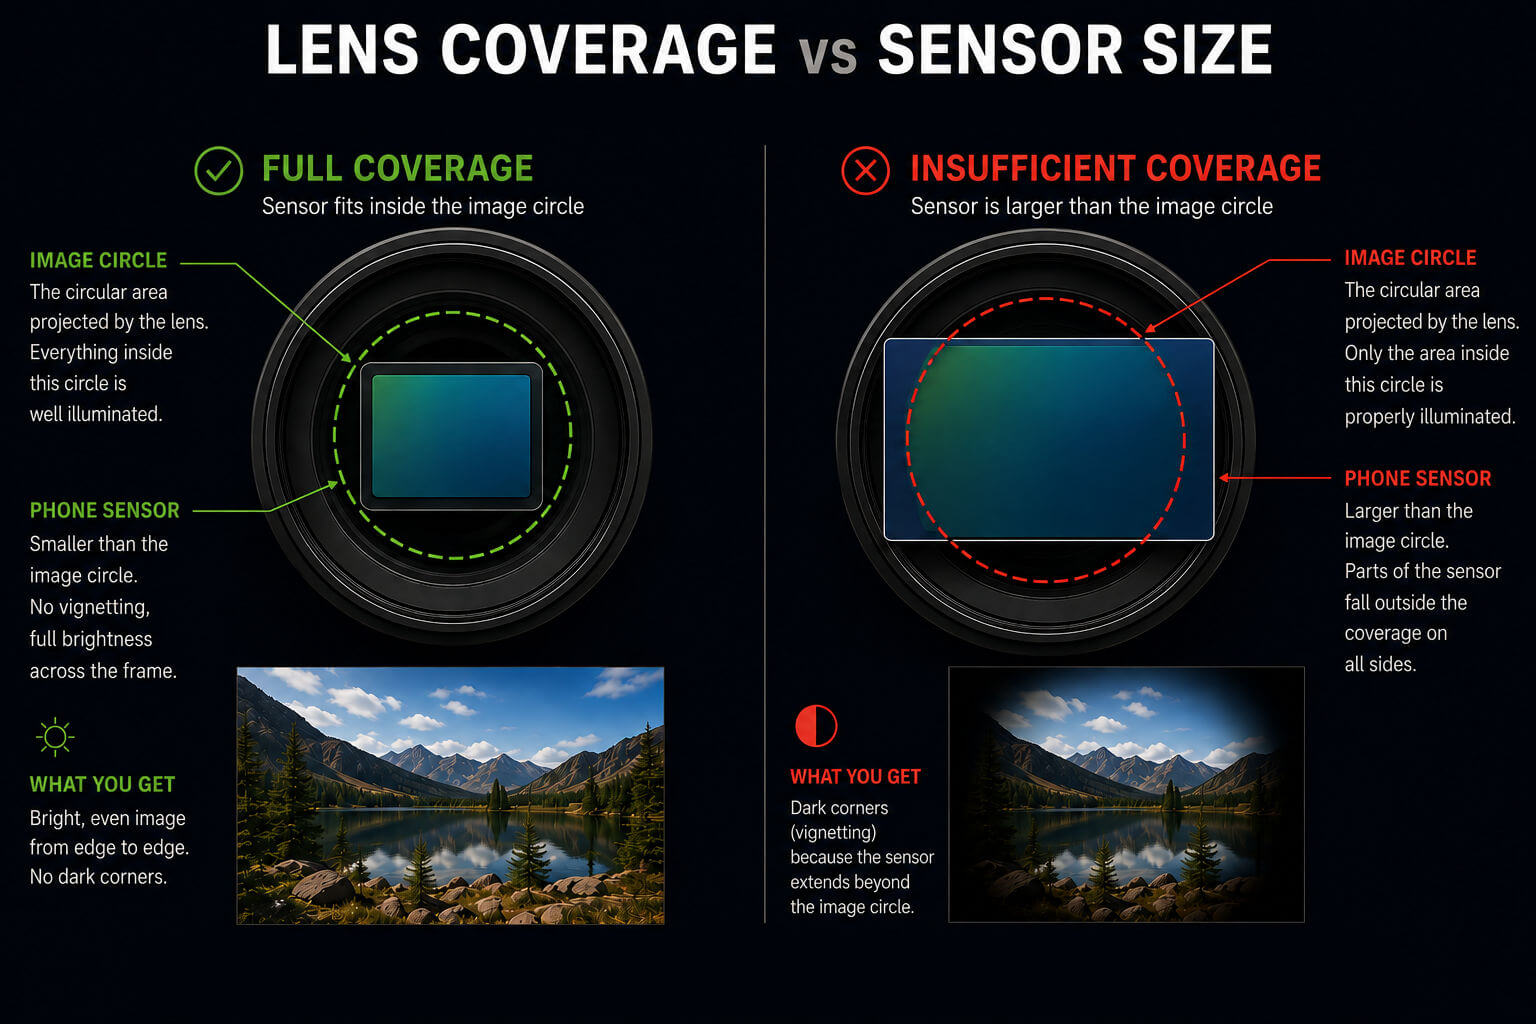
Lenses use the same format on their side, describing image circle the optics were designed to cover. The safe rule: lens coverage ≥ sensor size. Oversized lens just uses the center of a bigger image circle (the sharpest part of any lens), but undersized coverage can produce heavy vignetting.
Let’s say you see Tamron M112FM25 lot on eBay. It clearly says 1/1.2 on its body, and looking at the datasheet on the manufacturer’s website, you can see it is officially rated for 1/1.2" sensor max.
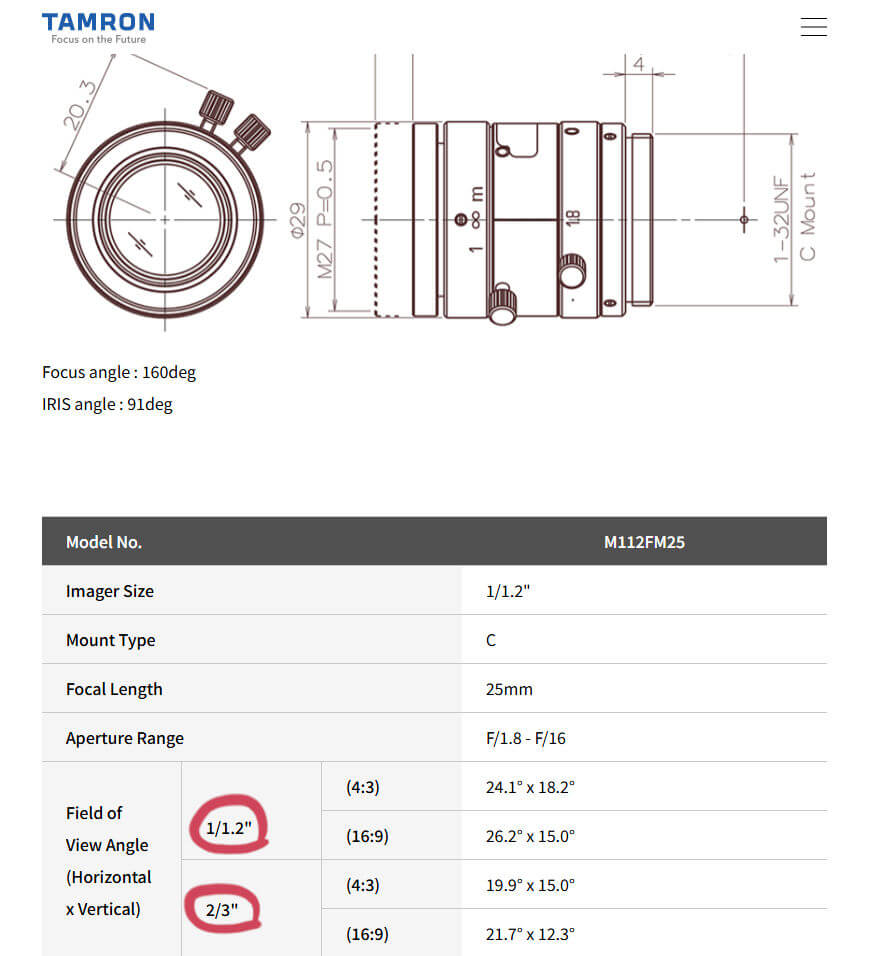
Now here comes the gamble: some lenses ship with hidden coverage margin (5-20%), so this particular lens model actually can cover 1"-type sensor! But you never know how much margin is there, so it’s a safe bet to just trust the datasheet.
2. Focal length
This is the number you’ll actually feel every time you shoot. It sets Field Of View (FOV) - how much scene fits in frame.
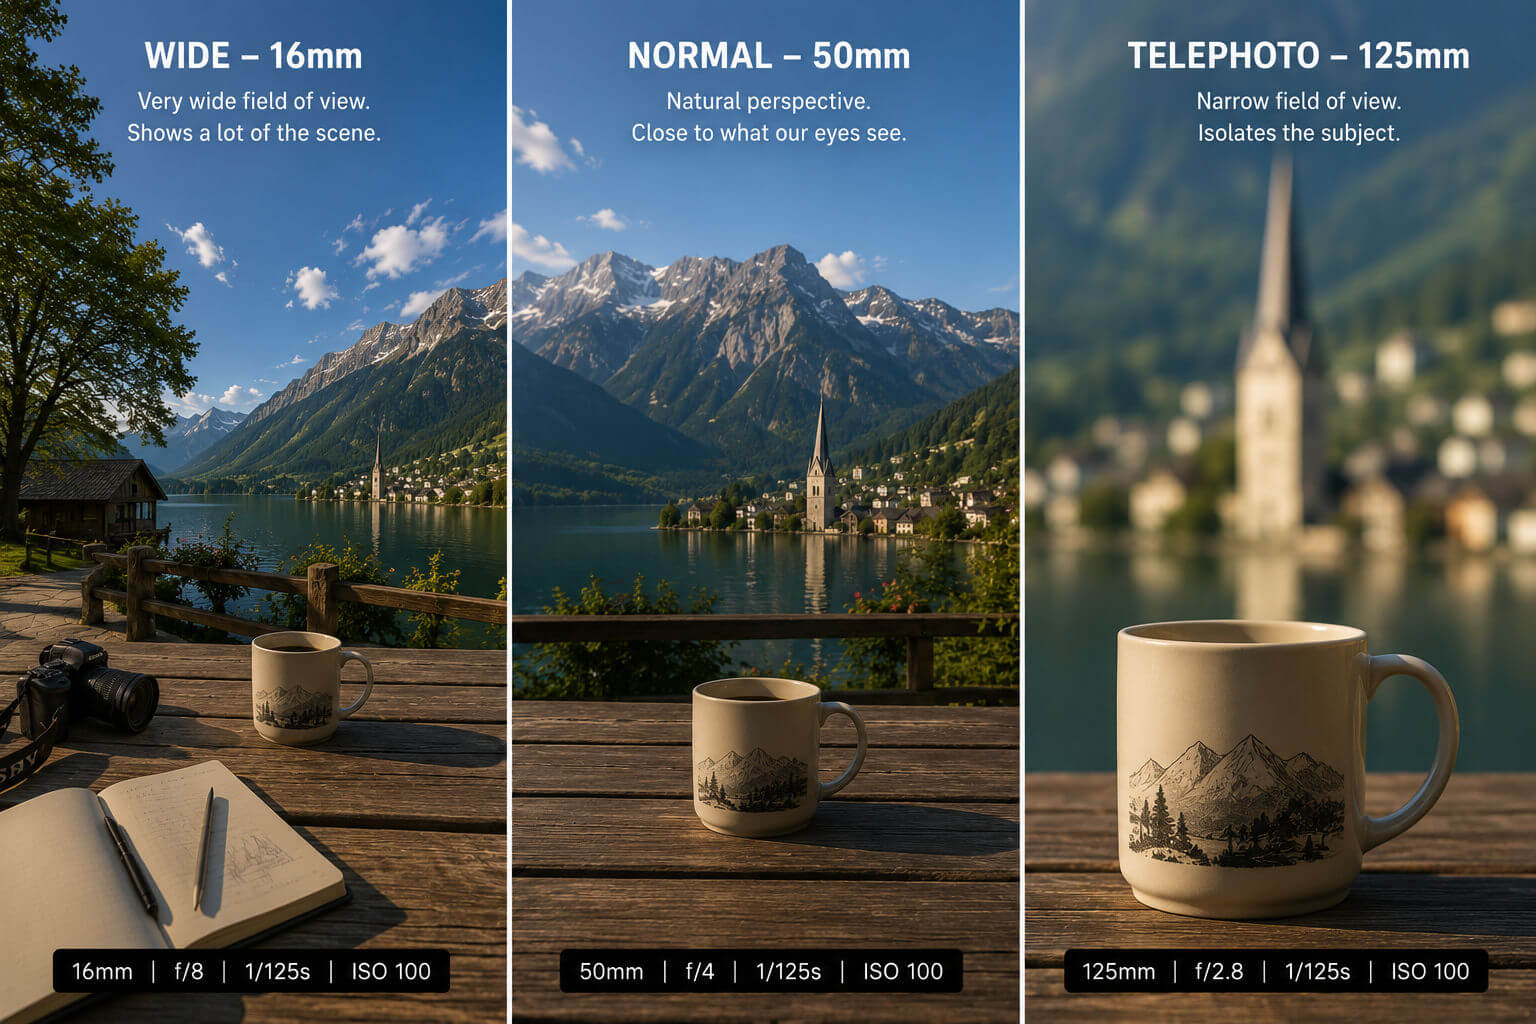
A rough starting map:
| Focal length | Typical use |
|---|---|
| up to 16mm | Ultra-Wide: landscapes, interiors, action, tight quarters |
| 16-35mm | Wide: landscapes, interior, tight quarters, architecture, street, environmental shots |
| 35-85mm | Standard: street, travel, everyday shooting, portraits |
| 85–135mm | Telephoto: portraits, details, product shots, tighter street work, wildlife, distant subjects, events |
| 135mm and above | Telephoto+: distant wildlife, the moon, specialized work |
Treat that table only as a Full-Frame reference. Because each sensor size has its own crop factor (how much cropped a Full Frame lens image would be on this sensor):
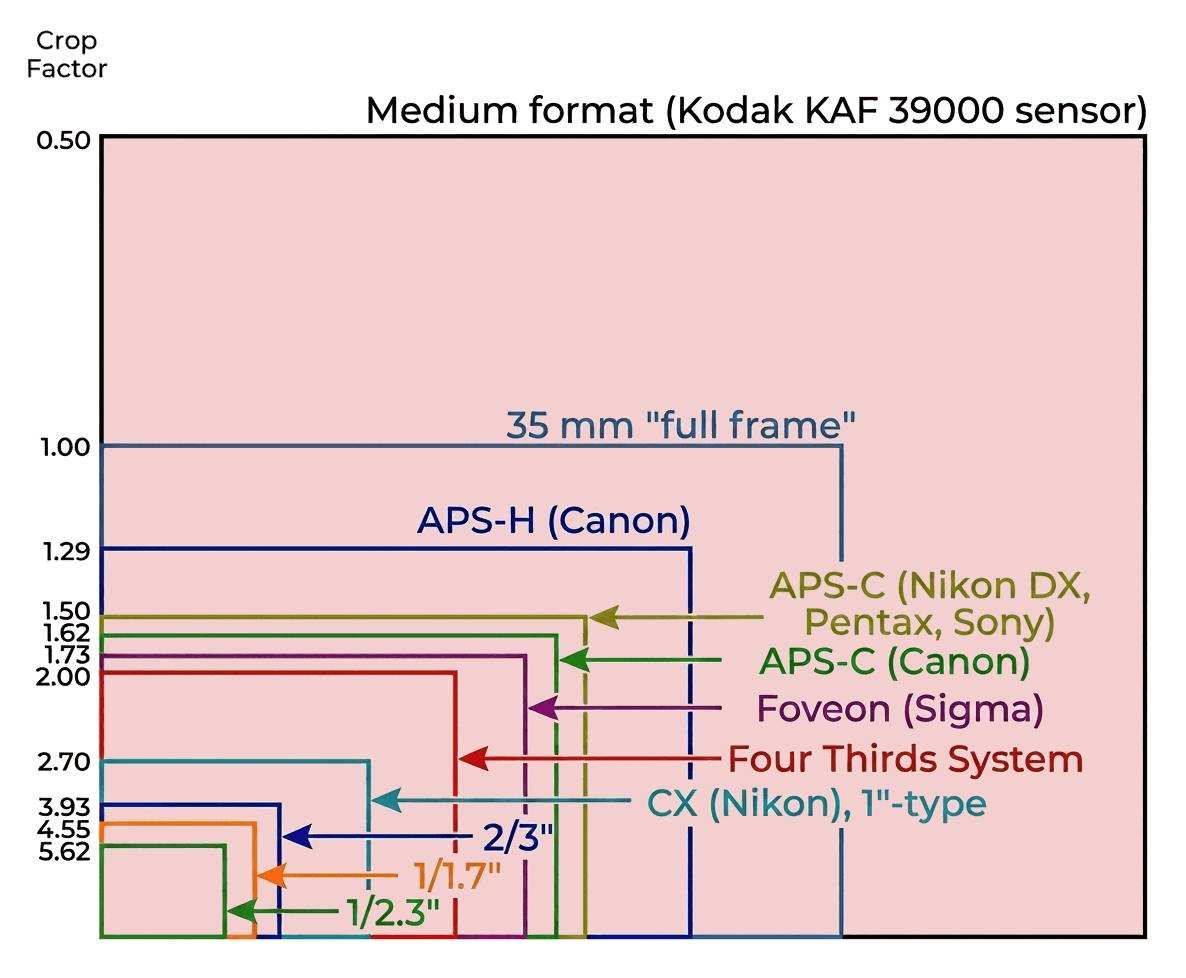
You can use Lens Selector tool to get your sensor crop factor and see how a certain focal length lens would behave with it. So our 25mm Tamron lens on a 1/1.2" sensor with its 3.3x crop factor really acts as a ~80mm lens, which is not Wide anymore - it’s around Telephoto range now.
Let’s talk about framing. Wide lenses (default built-in lens on the main sensor) aren’t automatically the easy option, even though they fit more content into frame. Cramming more scene into a shot means more chances for a stray trash can or power line to wander into the frame. Telephoto does the opposite job: it pushes away the clutter for you - so isolating subjects gets much easier. But the cost shows up elsewhere: more working distance needed, more sensitivity to shake, and focus accuracy that suddenly matters a lot more. If you’re buying a first lens and don’t know yet what you’ll shoot, Standard and Telephoto lenses are the safest general-purpose bets.
3. Megapixel number is an approximation of the lens optical performance
Chasing real image quality means leaving megapixels behind and getting into pixel pitch (physical size of one sensor pixel) and lp/mm (line pairs per millimeter lens side measurement). These numbers actually predict whether a lens can keep up with the sensor behind it. A lens resolving 100 lp/mm provides finer detail than one resolving 50 lp/mm (assuming the sensor can actually sample that detail). That "assuming" comes from the sensor’s Nyquist frequency:
Nyquist ≈ 1 / (2 × pixel pitch)
A 2.4µm pixel is a typical pixel size for modern 1"-type main sensor, which gives roughly 200 lp/mm of Nyquist frequency. That’s a demanding number: Full Frame lenses feeding 4–6µm pixels rarely need to resolve past roughly 80–110 lp/mm, so a phone sensor is asking its optics for ~2x more. But don’t go hunting for a 200 lp/mm lens only, though. The real system gets bottlenecked by lens MTF, diffraction, focus accuracy, demosaicing, motion blur, and image processing long before it hits that theoretical ceiling.
Honest machine-vision lens manufacturers publish Modulation Transfer Function (MTF) curves instead of slapping High Resolution 4K on the box. It shows how contrast degrades with frequency, and whether performance holds up at the edge of frame as well as the center. A lens can be razor-sharp dead center and mushy by the corners, and the MTF graph is the only place that shows up before you’ve bought it.
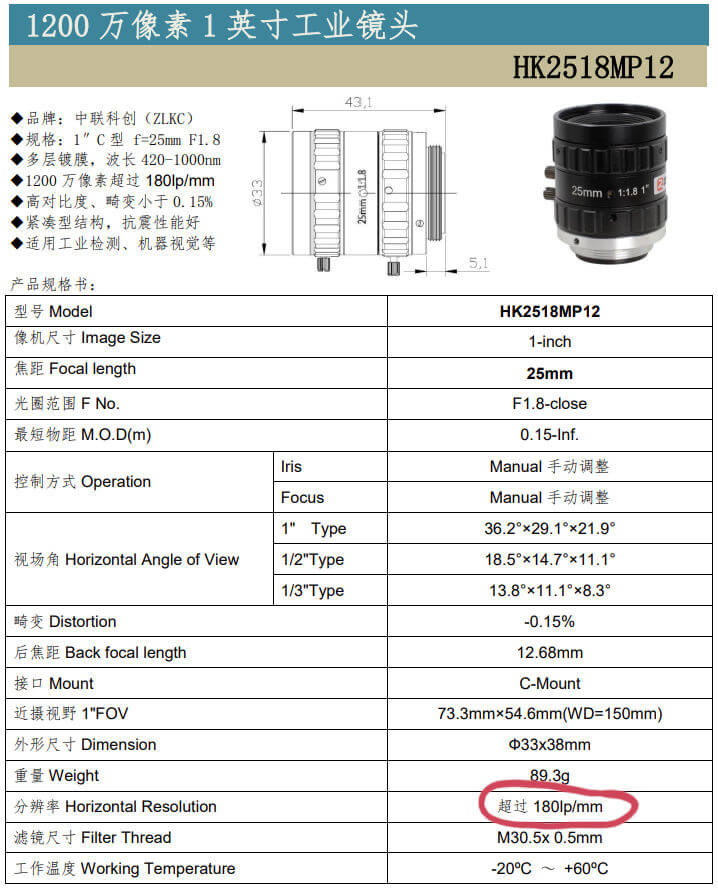
Tamron’s M112FM25 datasheet doesn’t provide any of that, ZLKC HK2518MP12 only provides 180 lp/mm value, while Schneider-Kreuznach Cinegon 16mm f/1.8 provides detailed graphs we are looking for.
4. Aperture: the fastest number on the barrel isn’t the one you’ll live in
Aperture sets how much light reaches the sensor and how thin your Depth Of Field (DOF) gets. F/1.4 glass is genuinely useful for low light, subject isolation, and stronger bokeh. But the fastest stop is rarely the one you’ll actually shoot at. Wide open, most lenses show their weakest side: lower contrast, more visible aberrations, softer corners, heavier chromatic aberration. Stop down to F/2–F/4 and you’re still collecting plenty of light while the optics settle into their actual sweet spot. Some designs are the exception and stay excellent wide open, but as a rule of thumb for older or cheaper glass, it holds.
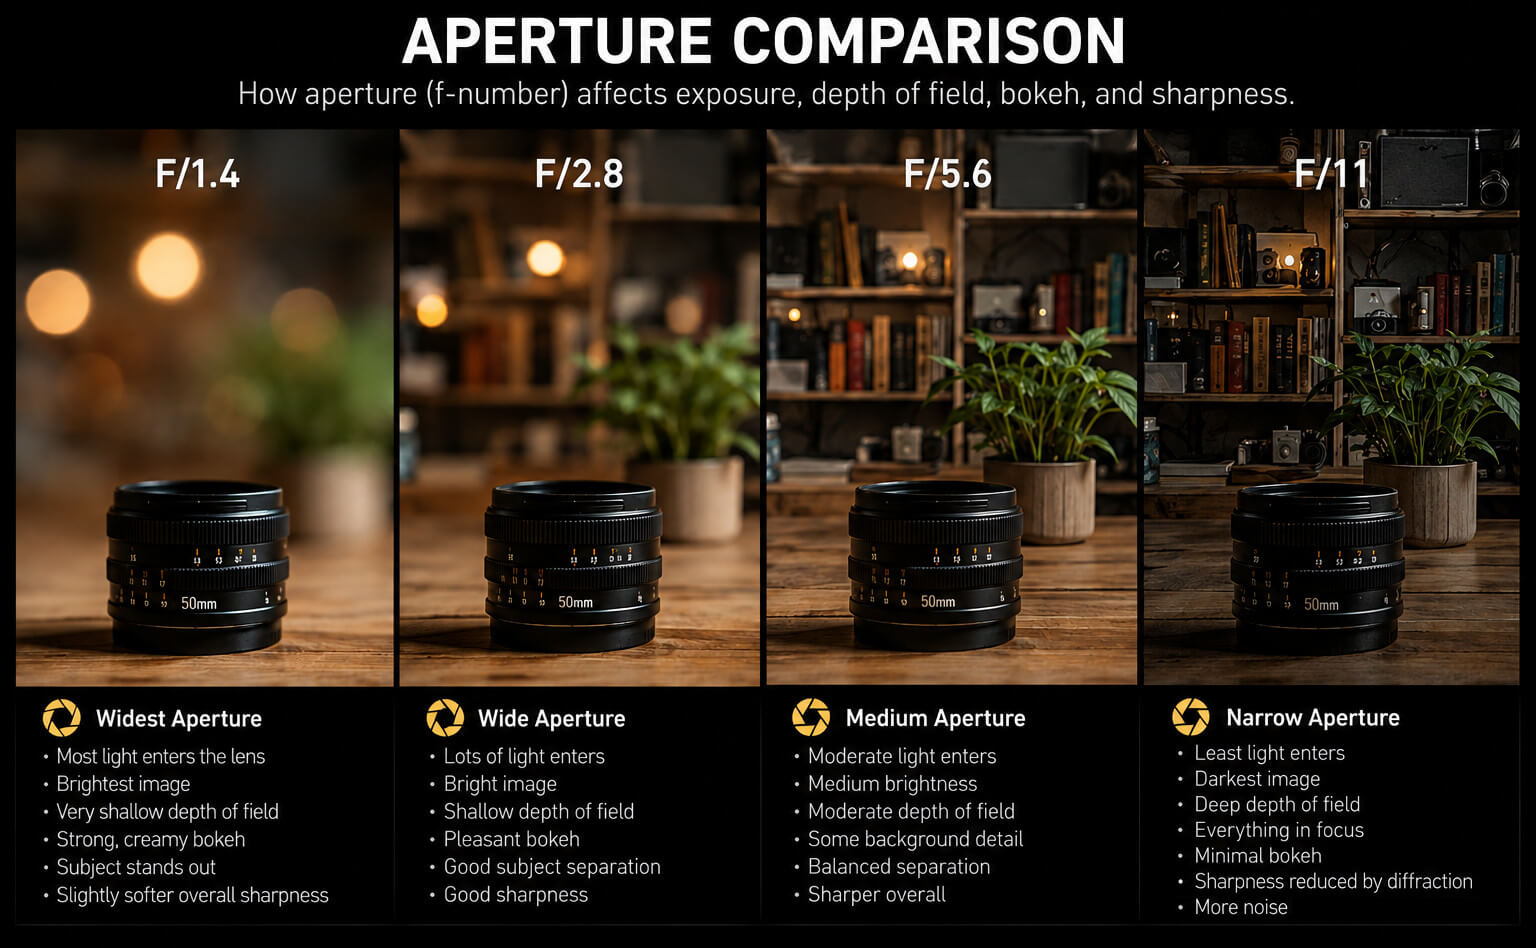
Stop down too far, though, and sharpness comes back down the other side. That’s diffraction: shrink the aperture enough and light stops behaving like it travels in straight lines and spreads into an airy disk instead of converging to a point. Eventually that blur costs you more resolution than the smaller aperture bought you in depth of field.
So it’s not a straight line from wide open = soft to smallest aperture = sharpest. It’s a curve: aberrations → sweet spot → diffraction, with the sweet spot sitting wherever those two effects cancel out best. For most everyday shooting, F/2–F/4 is where that balance usually lands.
5. Don’t let minimum focusing distance ruin your macro plans
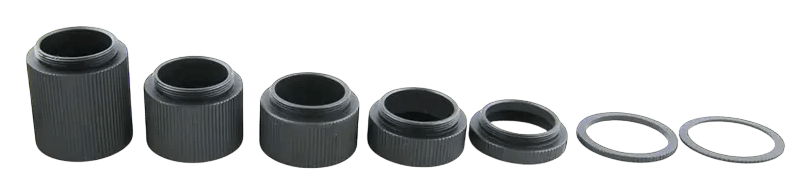
Every lens has the closest point where it can still resolve a sharp image. A 25mm lens that bottoms out at 30cm is dead weight if you’re trying to shoot PCB traces, insects, or flower stamens from a few centimeters away. Machine-vision datasheets list this number reliably. Marketplace listings for used CCTV and cine glass frequently don’t mention it at all. If close-up work matters to you, either hunt for a lens with a genuinely short minimum focus, or plan around it from the start with extension macro rings.
6. C-mount and CS-mount share a thread, not a flange distance
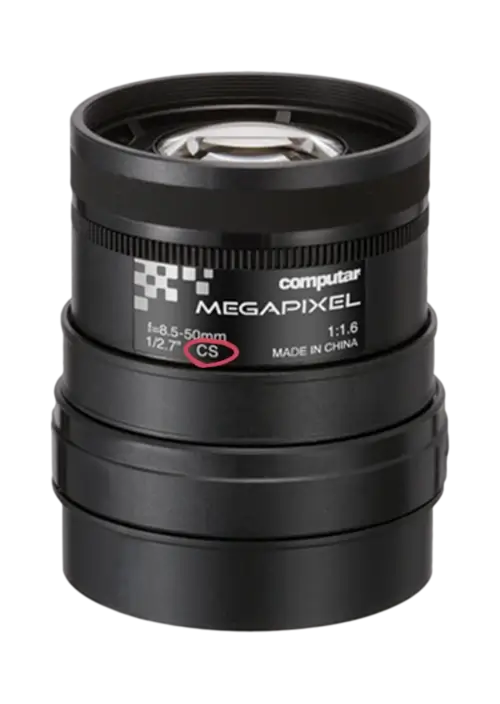
C-mount and CS-mount use the identical 1"-32 thread which is why they get mixed up in listings and can become a trap! CS-mount’s flange focal distance sits 5mm shorter than C-mount’s. Screw a CS lens onto a C-mount body and it threads in fine, then never reaches infinity focus, because the sensor is sitting 5mm too far from where the lens expects it. It’s exactly the mixup that happens constantly in cheap CCTV listings where sellers don’t always specify which mount they’re selling.
7. What kind of C-mount lens are you actually buying?
The C-mount thread hides several completely different worlds behind identical thread.
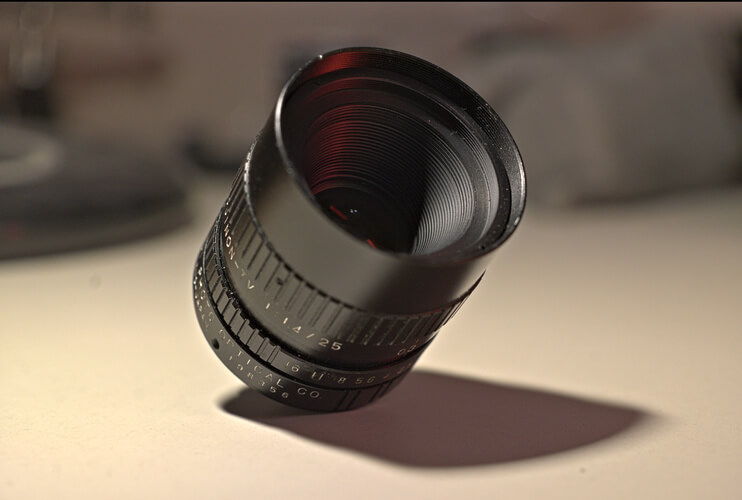
CCTV and old broadcast lenses
The bargain bin. Computar, Fujinon, Kowa, Tamron, Cosmicar, and Tokina all produced huge volumes of industrial, CCTV, TV, and broadcast glass over the decades, and a lot of it is still floating around cheap.
Quality is a lottery. Some are genuinely sharp and well-corrected, others have obvious distortion, low contrast, or intense flares. That’s not automatically bad news because even a $25 lens with weird rendering can be still fun to shoot!
Vintage cine lenses
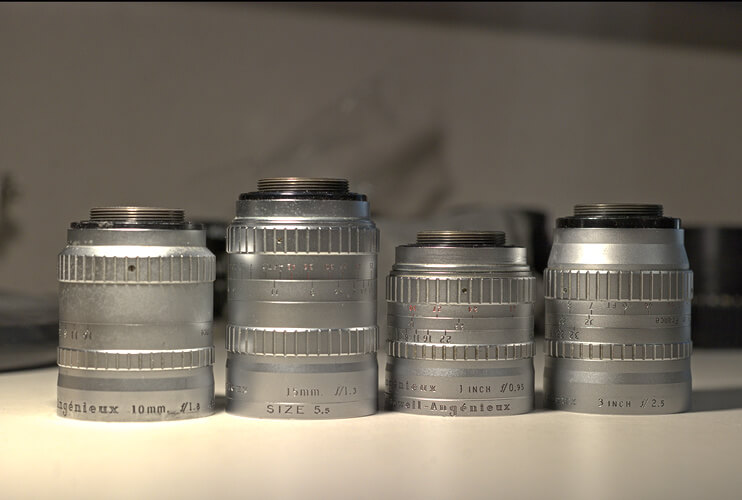
A different category entirely. Kern-Paillard, Angénieux, old Schneider-Kreuznach, Taylor-Hobson/Cooke, Wollensak are some of the names worth searching if you’re circling old 16mm film cinema optics.
These cost more, and max resolution or clinical sharpness are not what you’re paying for. You’re paying for the vintage rendering: distinctive vintage flare, soft edges, unusual bokeh, and a whole basket of optical "flaws" that machine-vision engineers spend their careers eliminating. Which is exactly why they’re interesting. If the goal is a photo that doesn’t look like it came out of the same computational pipeline as every other phone photo on the internet - fifty-year-old glass with character is precisely the right tool.
Machine-vision lenses
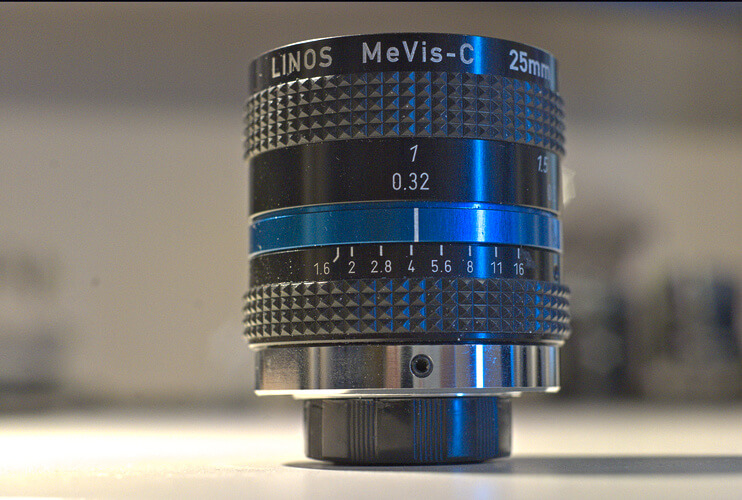
The opposite end of the spectrum: Linos MeVis, modern Schneider-Kreuznach, ZLKC build C-mount optics for industrial cameras and high-resolution sensors. They’re the easiest lenses to evaluate technically because the manufacturers actually publish datasheets. The catch is exactly what you’d expect: precision costs. But if you want the sharpest, most predictable result and don’t mind paying for it, this is where I’d start. And if wading through datasheets sounds like a bad afternoon, the Lens Selector does the filtering for you: narrow down the most affordable precision machine-vision lenses interactively, so you can be sure what exactly you are buying.
8. Adapt the lens you already own
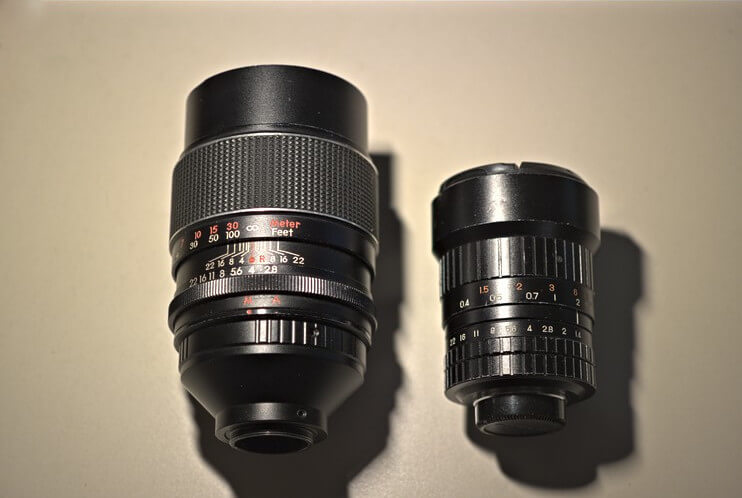
C-mount is convenient because it was built around small sensors and a short flange focal distance. With the right adapter you can bolt on glass from almost any system: vintage M42, APS-C, Full Frame, whatever’s sitting in a drawer. The tradeoff is size. A Full Frame lens throws an image circle far bigger than your phone sensor needs. So all that extra glass isn’t buying you anything, you’re just cropping into the center of an oversized image circle. A smaller C-Mount lens does the same job and it’s much more convenient to carry around.
So if you are buying a lens specifically for a phone mod, then C-mount is more sensible solution. But if you already own some glass - a cheap adapter turns that whole collection into a new set of phone-camera options.
9. Buying used
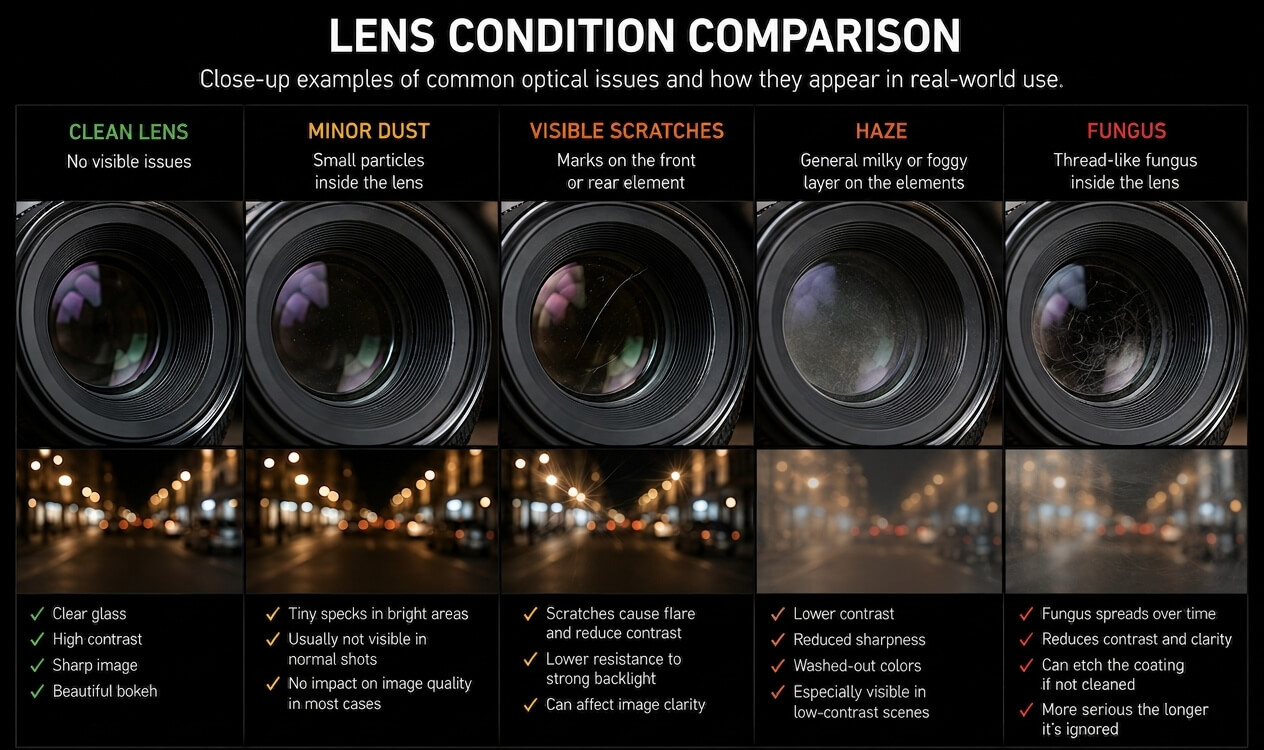
Used lens can be a genuine bargain, but the cosmetic condition of the barrel tells you almost nothing. Get the seller to show you both optical surfaces and ask specifically about:
- Front-element scratches
- Rear-element scratches
- Damaged coatings
- Haze
- Fungus
- Dust inside the lens
- Oil on aperture blades
- Stiff or frozen focus
- Damaged iris mechanism
- Dents or damaged filter threads
Not all of those matter equally, though. A handful of dust specks floating inside the barrel is essentially irrelevant. A small scratch near the edge of the front element usually disappears into the final image too. What actually costs you image quality: a deep scratch across the center of an element, real coating damage, haze, or fungus. All of them cut contrast and dump flare and veiling glare straight into your shots. Rear-element damage deserves extra scrutiny because it sits close to the sensor. Mechanical issues are a different risk profile entirely: a frozen focus ring on otherwise perfect glass might be a great buy if you’re willing to crack it open and re-grease it.
10. Getting weird
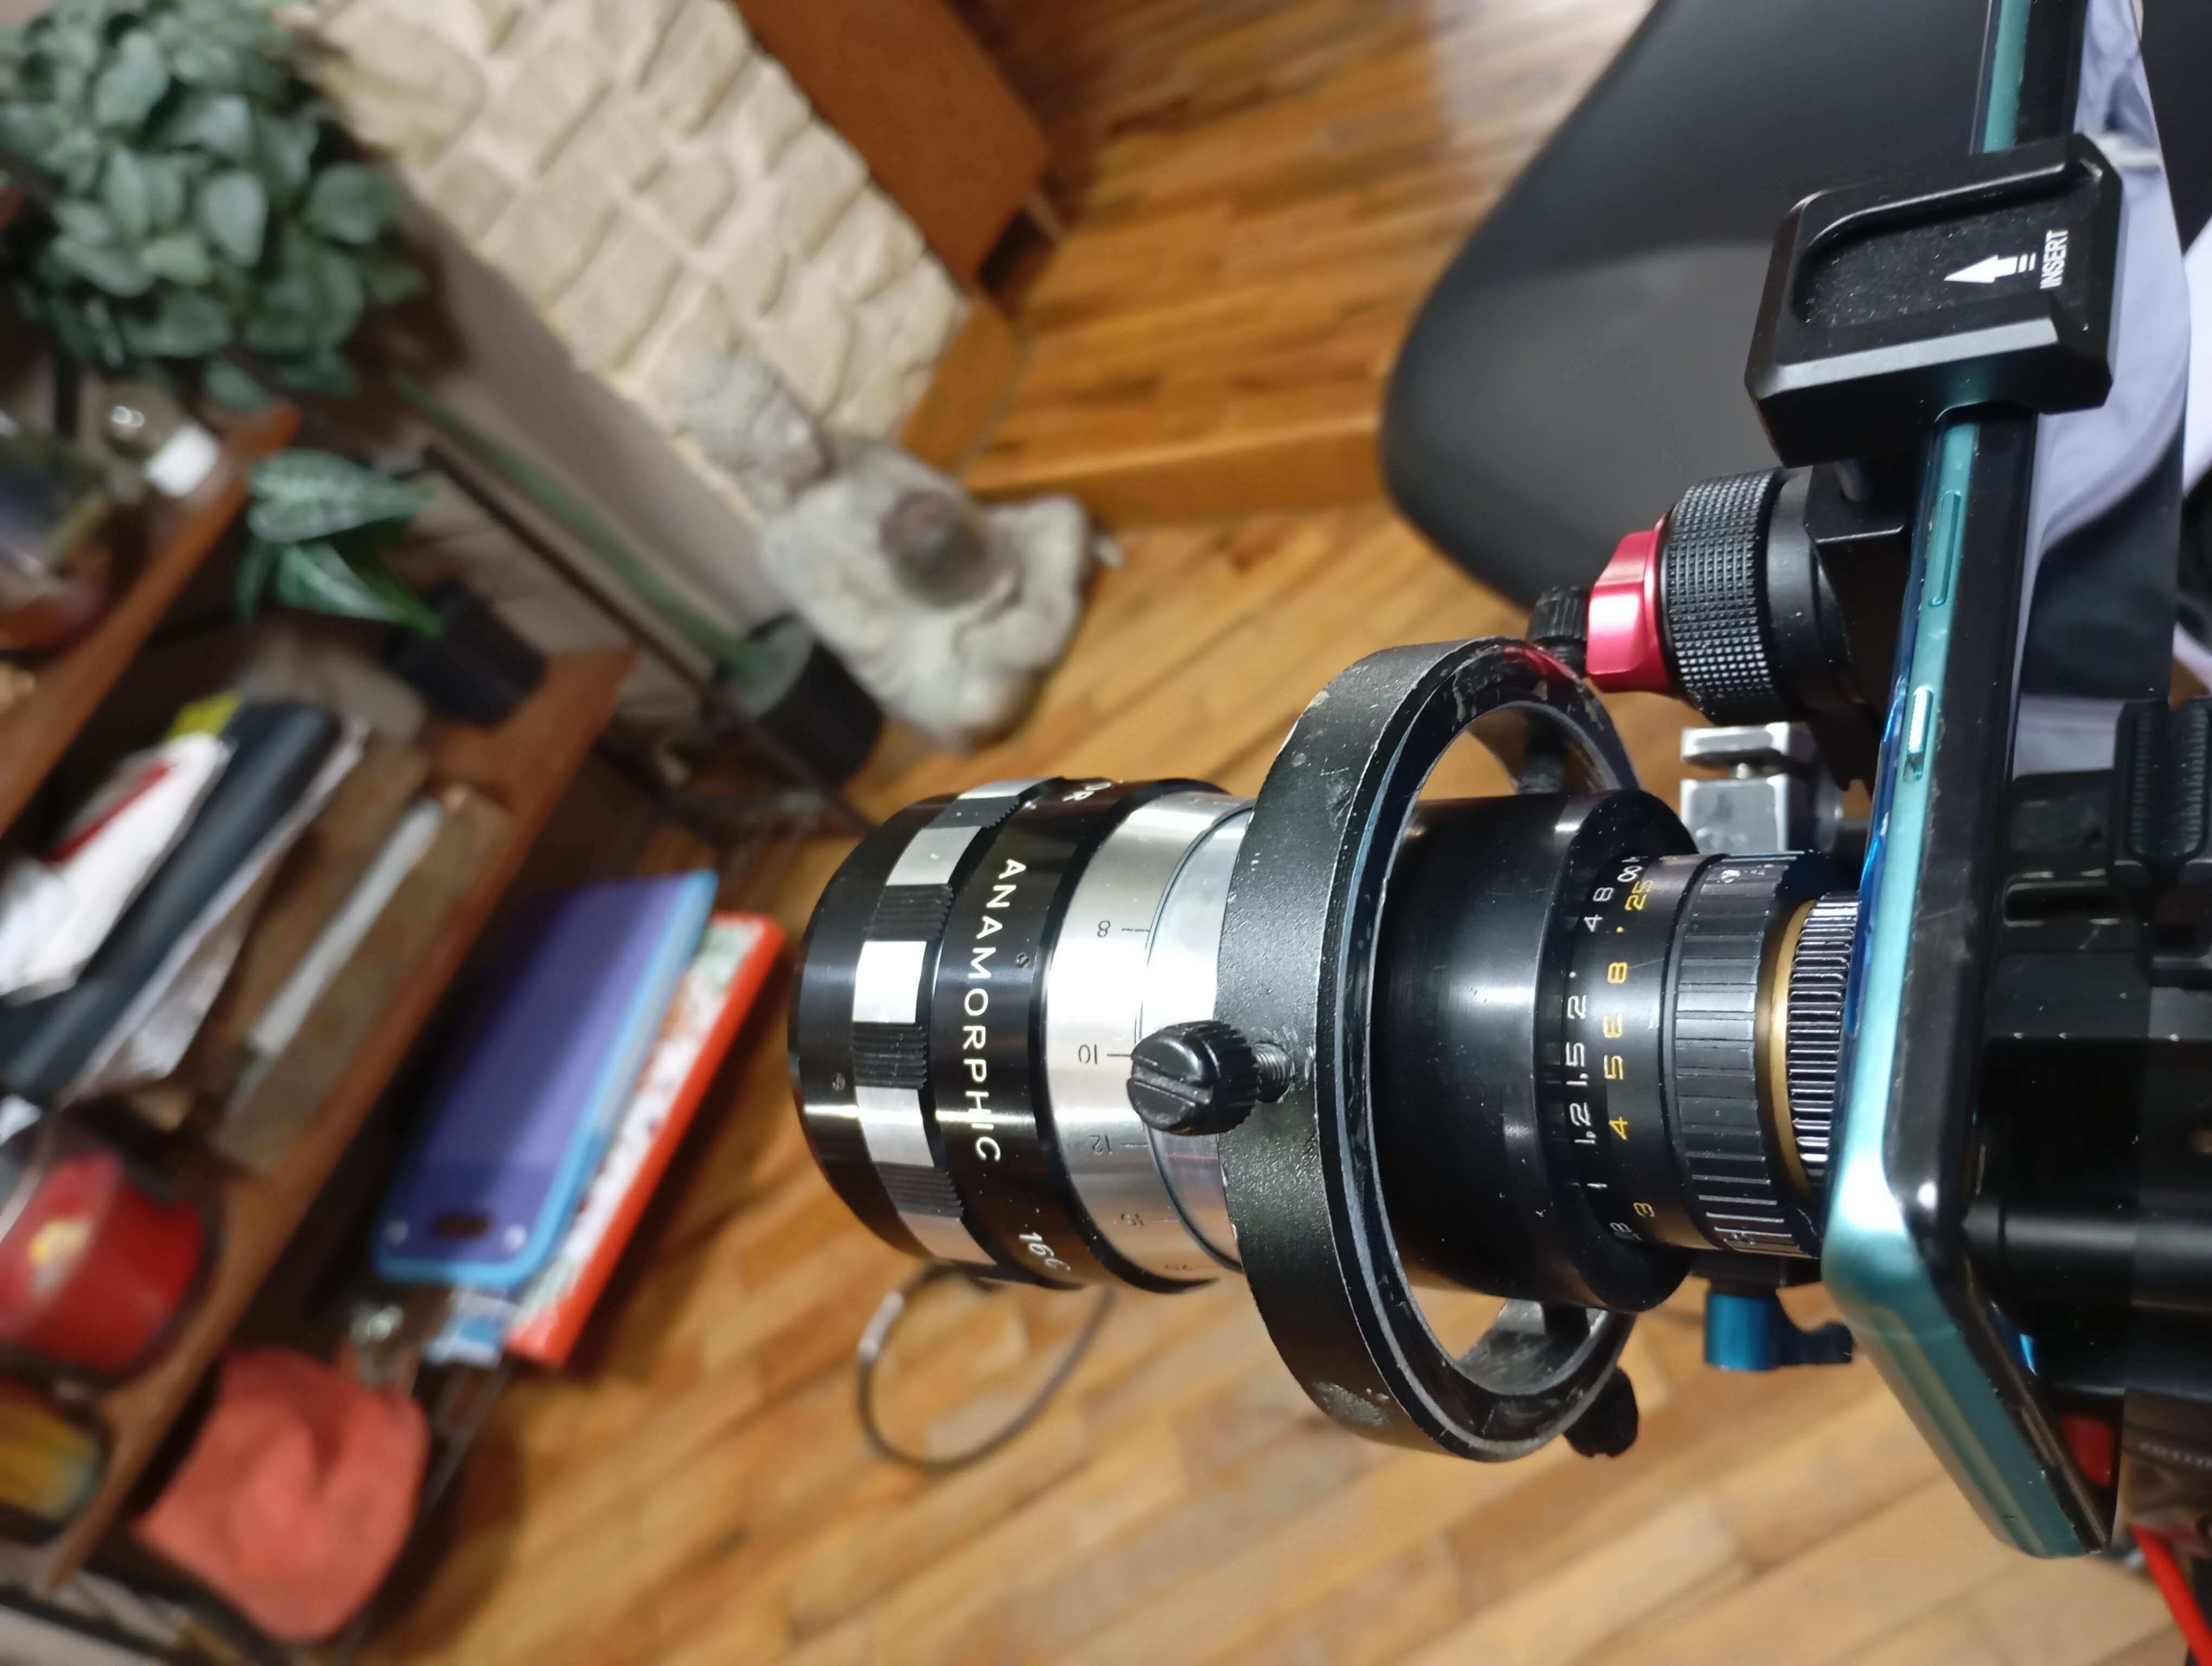
C-mount is a great excuse for experiments that have nothing to do with normal photography. Anamorphic glass squeezes the image horizontally for widescreen compression and throws in its signature horizontal flare. Macro accessories close the working distance down to millimeters. Tilt-shift hardware moves the plane of focus independent of the sensor. You can just bolt them on and turn the same sensor into a completely different instrument. None of this is necessary for a normal camera. But once you’re already committed to a C-mount adapter, there’s no real reason to stop at ordinary photographic lenses.